
- Тип техники
- Бренд
Просмотр инструкции материнской платы Gigabyte 8S661FXME RZ, страница 17
- 17 -
Hardware Installation Process
English
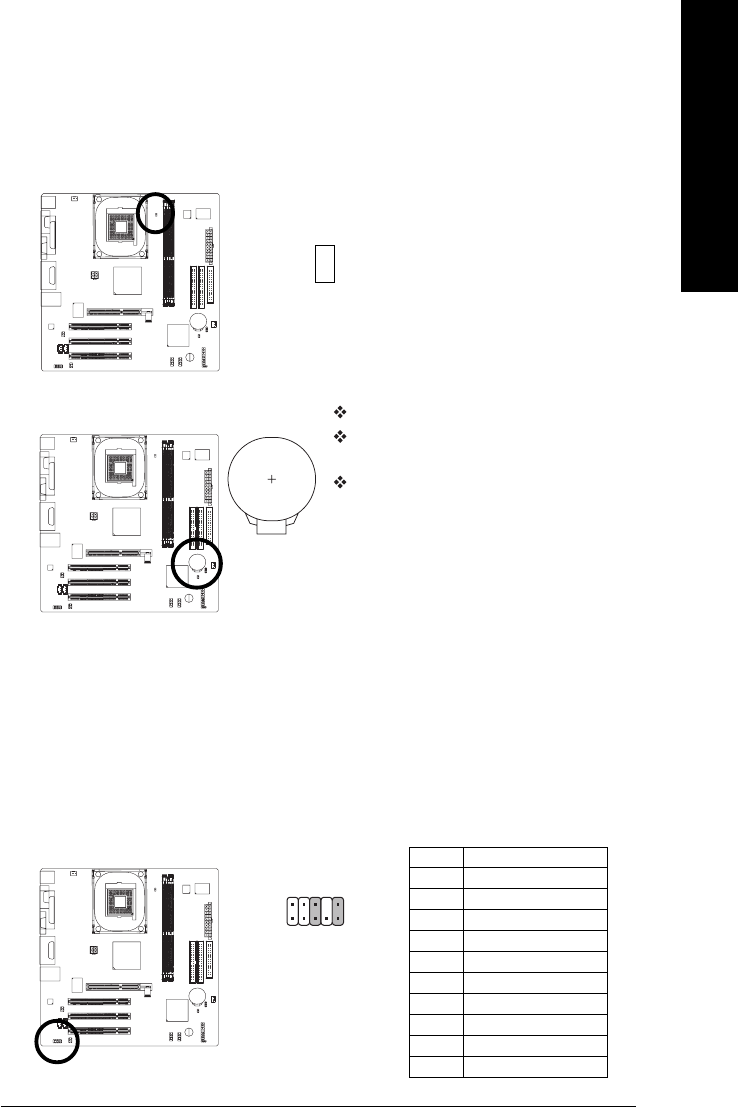
10) BATTERY
11) F_AUDIO (Front Audio Panel Connector)
If you want to use Front Audio connector, you must remove 5-6, 9-10 Jumper.
In order to utilize the front audio header, your chassis must have front audio connector. Also please
make sure the pin assignments for the cable are the same as the pin assignments for the front audio
header. To find out if the chassis you are buying support front audio connector, please contact your
dealer. Please note, you can have the alternative of using front audio connector or of using rear
audio connector to play sound.
9) RAM_LED
Do not remove memory modules while RAM_LED is on. It might cause short or other unexpected
damages due to the stand by voltage. Remove memory modules only when AC power cord is
disconnected.
+
_
Danger of explosion if battery is incorrectly replaced.
Replace only with the same or equivalent type recom
mended by the manufacturer.
Dispose of used batteries according to the manufacturer's
instructions.
If you want to erase CMOS...
1. Turn off the computer and unplug the power cord.
2. Take out the battery gently and put it aside for about 10
minutes (Or you can use a metal object to connect the
positive and negative pins in the battery holder to make
them short for one minute).
3. Re-install the battery.
4. Plug the power cord and turn on the computer.
91
102
Pin No. Definition
1 MIC
2 GND
3 MIC_BIAS
4 Power
5 Front Audio(R)
6 Rear Audio(R)/Return R
7NC
8 No Pin
9 Front Audio(L)
10 Rear Audio(L)/Return L
Ваш отзыв будет первым