
- Тип техники
- Бренд
Просмотр инструкции стиральной машины Gorenje WTD 63111, страница 5
9
EN
8
EN
2 / INSTALLING YOUR APPLIANCE
• REMOVING THE TRANSPORT BRACES (continued)
DD
EE
EE
FF
GG
Fig. 08
Fig. 09
HH
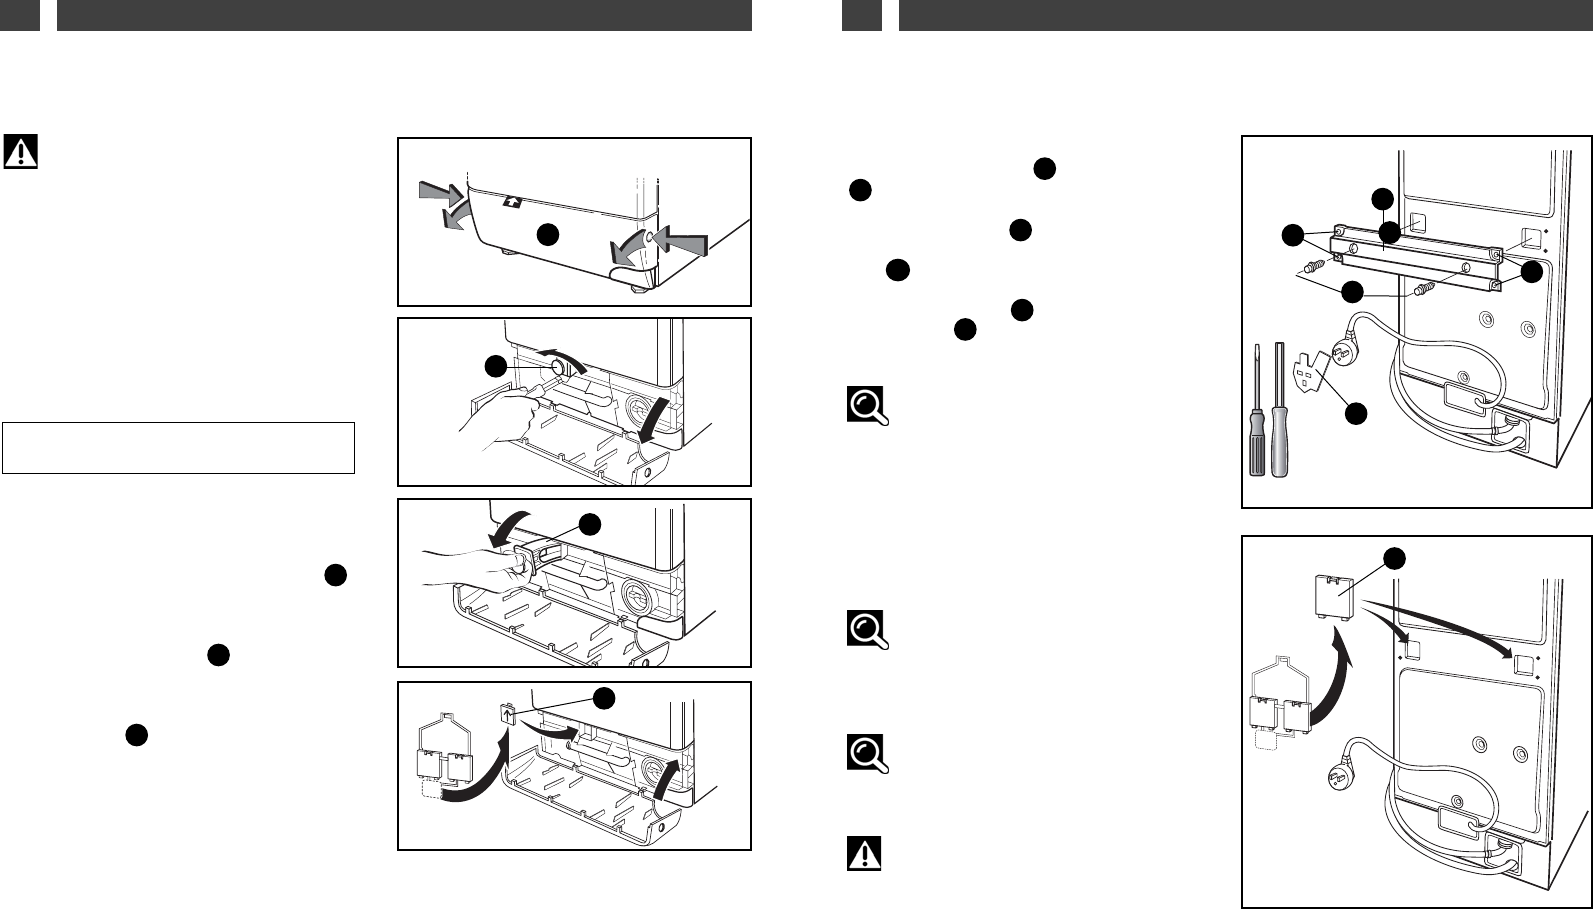
• REMOVING THE TRANSPORT BRACES
Important :
Before use, the following operations
must be performed.
These operations involve removing all parts
used to immobilise the tank of your appliance
during transport.
These "brace removal" operations are
necessary for the smooth operation of your
appliance and compliance with current
safety standards.
If these operations are not performed in full,
this may cause serious damage to your
appliance during operation.
First remove the expanded polystyrene strut
located under the lid.
••
Front transport brace :
— Open by pressing on the bosses on each
side of the baseboard at the same time
while pulling the baseboard towards you
(Fig.
04).
— Using a 10 mm wrench, unscrew the "front"
brace maintenance screw made from red
plastic
(Fig. 05).
— Remove the "front" brace
(Fig. 06).
— Plug the hole left by the brace using the
cover provided
(Fig. 07).
— Reattach the baseboard
(Fig. 07).
CC
BB
AA
AA
2 / INSTALLING YOUR APPLIANCE
Fig. 04
Fig. 05
BB
AA
Fig. 06
BB
Fig. 07
CC
••
Rear transport brace :
— Remove the 2 screws and the 4 screws
DD
the 4 screws back in their original posi-
tion in the body.
Tip :
We recommend that you keep all parts
for bracing as you will have to replace them
if you need to move your machine at a later
date.
All these parts, as well as those used for the
entire machine are made from recyclable
materials. Please consider this when dispo-
sing of them at the end of your machine's
service life.
Information :
Before leaving the plant your
appliance was thoroughly tested; therefore
you may notice a small amount of water in
the tank or in the detergent dispensers.
Information :
If you wish to place your appliance in
line with your furniture units, you can break
the hose attachment hooks.
Important :
Be careful not to crush the hoses.
EE
using a 10 mm tube wrench or a flat head
screwdriver
(Fig. 08).
— Remove the brace
.
— Release the power cord from the plastic
part attaching the transport brace.
— Plug the holes left by the brace using the
remaining 2 covers
(Fig. 09)
and screw
HH
GG
FF
EE
Ваш отзыв будет первым