
- Тип техники
- Бренд
Просмотр инструкции стиральной машины Gorenje WTD 63111, страница 14
27
EN
26
EN
5 /
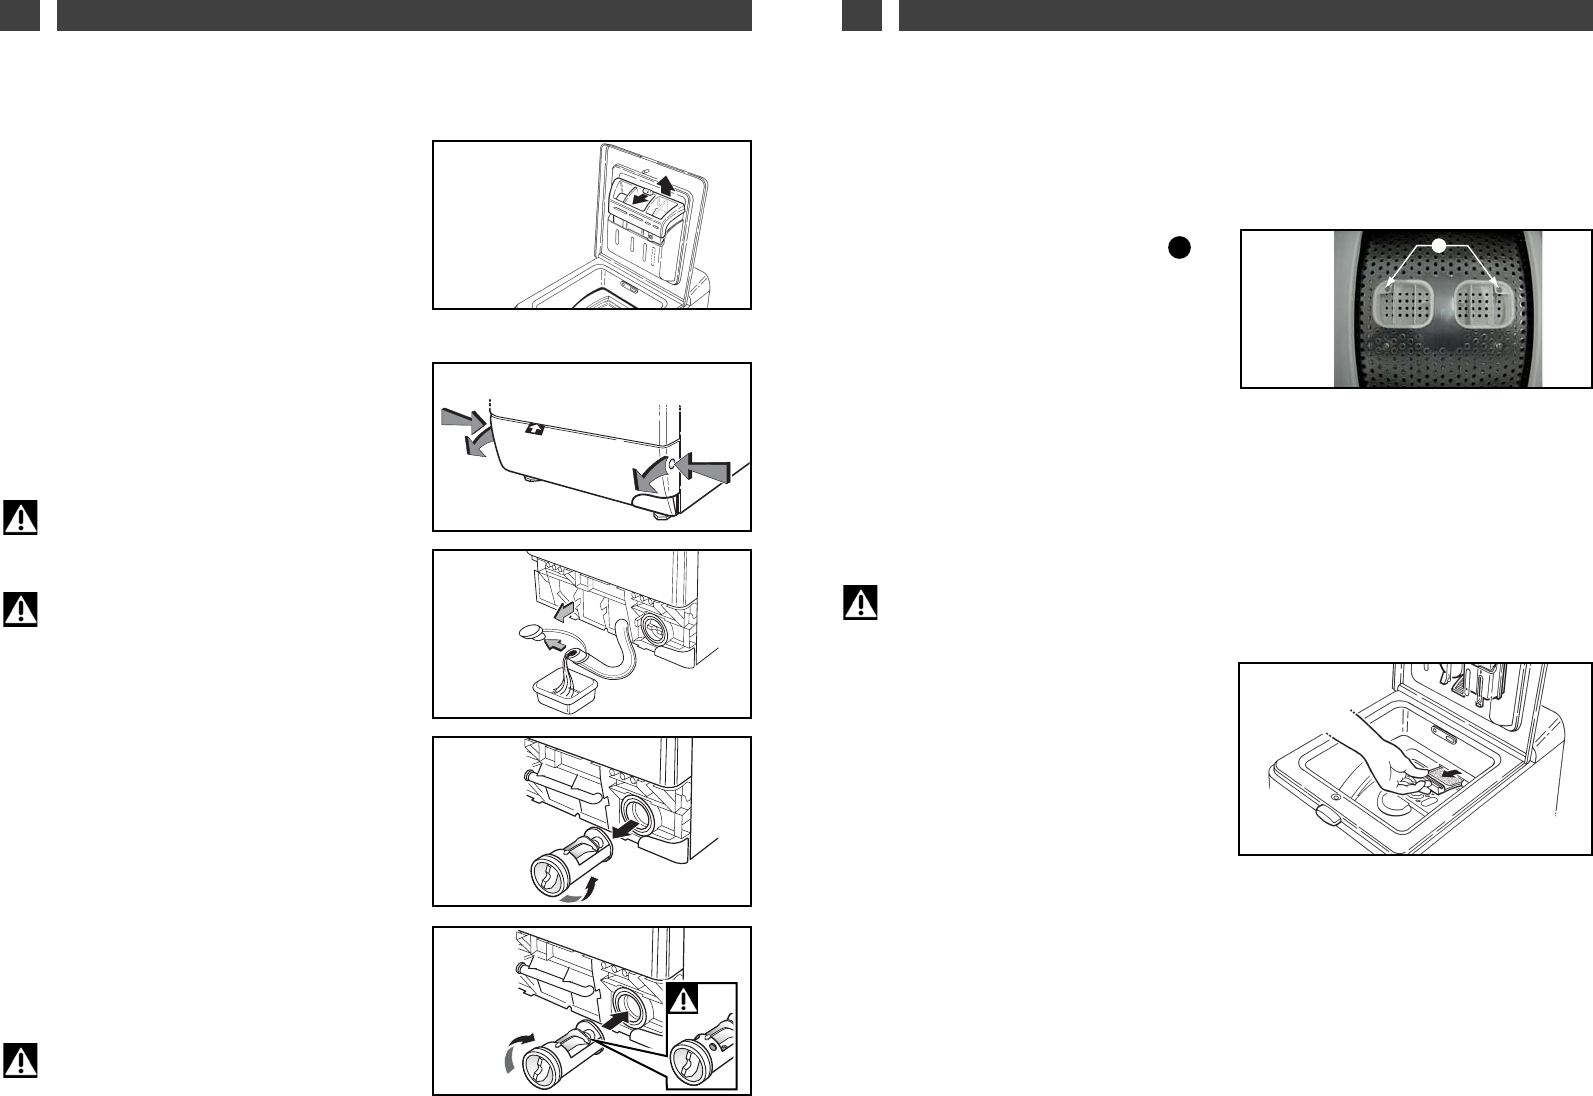
EVERYDAY MAINTENANCE OF YOUR APPLIANCE
• CLEANING THE DRYING FILTER
• ACCESS TO THE BOTTOM OF THE TANK
Important :
The filter must be cleaned after every
drying cycle.
The purpose of this filter is to catch the lint
that forms during drying, so that it does not
enter the air circulation system.
To clean the drying filter, proceed as follows:
— open the machine lid.
— the filter handle is on the right, near to the
drum opening.
— remove the filter from its housing by pulling
it towards you
(Fig. 24).
— clean it without wetting it by pulling off the
thin layer of lint covering it.
— return the filter to its housing, pushing it
firmly into place.
A
Fig. 23
Fig. 24
Removing the vane from the drum :
If an item of laundry falls between the drum
and the vane:
— Close the drum after emptying it.
— Turn the drum until the vane attaches.
— Unscrew and remove the 2 screws
(TORX T20 recesses), the vane falls into the
drum. Take the precaution of placing a towel
to cushion the fall
(Fig. 23).
— Turn the drum around and open it.
— Pick up the fallen part through the openings
created by removal of the vane.
— To refit, insert the vane, from front to back,
into its housing.
— Close the drum and turn it around.
— Hold the vane while you place the screws.
AA
• CLEANING THE PUMP FILTER
• CLEANING THE DETERGENT DISPENSER
5 / EVERYDAY MAINTENANCE OF YOUR APPLIANCE
Clean the detergent dispenser regularly.
To do this:
— Push the button forwards and pull the dis-
penser upwards
(Fig. 18).
— Hold the dispenser under the hot water tap
to thoroughly clean the inside of the compart-
ments and the water intake areas.
— For easier cleaning of the fabric softener
compartment, it has a removable siphon
(coloured part). Make sure you replace it cor-
rectly after cleaning.
— Then replace the entire detergent dispenser
in its housing, making sure it is positioned
correctly.
Fig. 18
Fig. 19
Fig. 20
Fig. 21
Fig. 22
Important :
If you do not clean the pump filter regu-
larly, your machine's performance may be
compromised.
Important :
First program emptying then discon-
nect the power supply.
To clean the pump filter :
— Remove the baseboard
(Fig. 19).
— Place a flat recipient under the pump
access.
— If your machine has a drain pipe, take it out
by detaching the cap from the base
(Fig. 20).
— Open the cap at the end of the pipe and let
the water flow into the recipient
(Fig. 20).
— Close the cap, making sure that it is pushed
down and reattach it in the base.
— Unscrew the cap of the drainage pump filter
(Fig. 21).
— Clean the filter.
— To replace it, insert it and point the small lug
on the cylindrical surface upwards
(Fig. 22).
— Screw the cap back on as far as it will go
(Fig. 22).
— Replace the baseboard in its original posi-
tion.
Important :
At the next wash, check that there is no
leak during the filling phase.
Ваш отзыв будет первым