
- Тип техники
- Бренд
Просмотр инструкции акустики Vitek VT-4025-4035 SR, страница 7
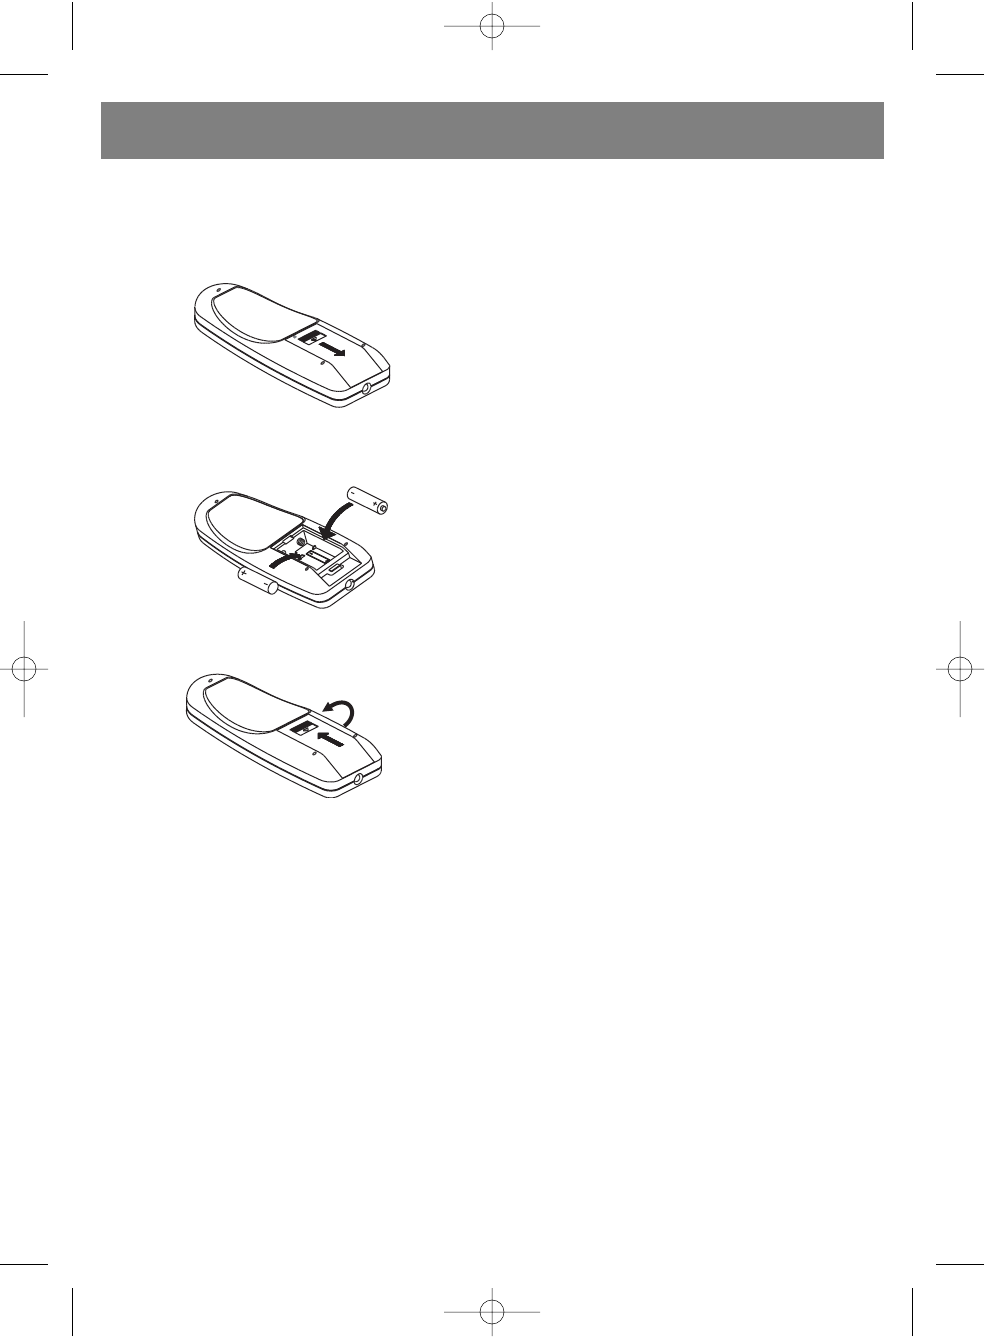
1. Before using the remote controller, please insert correct
type of batteries into the battery compartment.
2. The remote controller uses 2x1.5V/AAA batteries.
3. Please insert the batteries as indicated below.
A. Remove the battery compartment cover.
B. Insert 2 batteries as per the polarities marked inside the
battery compartment.
C. Replace the battery cover.
4. If the remote controller does not function, please check
the batteries or change the batteries before consulting
technical support.
5. To properly use the remote controller, please put its front
emitter right at the receiving lattice (remote sensor) of
the main system.
6. The normal and effective distance for operating the sys-
tem by the remote controller is 7 meters within the sys-
tem, and at 30 angle left or right diverged away from the
system.
OPERATING INSTRUCTION - MAIN UNIT
A.. Switch On/Off the Product
1. Before turning on the system, please connect it
according to the System Connection Instruction.
2. Connect AC power supply with this product.
(Caution: Power source must be consistent with this
product.
3. Press on the power switch button (18) on the Rear
Panel of the main unit to switch on the system, the stand-
by indicator will light up.
Press it once again to switch off the unit. Then press the
standby button (6) on the main unit or button (23) on the
remote controller to enter the normal status. Press the
button (6) or button (23) on the remote controller once
again to keep power in standby status.
B. VOLUME Selection
1. Press the VOL+ button (8) on the front panel of the
main unit or VOLUME + button (31) on the remote con-
troller to maximize the sound output. Standby Indicator
(9) on the front panel will light up and flash when the
Volume is increased to Maximum accordingly.
2. Press the VOL- button (7) on the front panel of the
main unit or VOLUME - button (41) on the remote con-
troller to minimize the sound output. Standby Indicator
(9) on the front panel will light up and flash when the
Volume is decreased to Minimum accordingly.
C. BASS Selection
1. Press the BASS + button (30) on the remote controller
to maximize the Bass output. Standby Indicator (9) on
the front panel will light up and flash when the Bass
Output is increased to Maximum accordingly.
2. Press the BASS - button (32) on the remote controller
to minimize the Bass output. Standby Indicator (9) on the
front panel will light up and flash when the Bass Output is
decreased to Minimum accordingly.
D. TREBLE Selection
1. Press the TREBLE + button (39) on the remote con-
troller to maximize the Treble output. Standby Indicator
(9) on the front panel will light up and flash when the
Treble Output is increased to Maximum accordingly.
2. Press the TREBLE - button (40) on the remote con-
troller to minimize the Treble output. Standby Indicator
(9) on the front panel will light up and flash when the
Treble Output is decreased to Minimum accordingly.
E. BALANCE Selection
1. Press the BALANCE L button (26) on the remote con-
troller to minimize the Left speaker output.
2. Press the BALANCE R button (35) on the remote con-
troller to minimize the Right speaker output.
ENGLISH
7
4025.qxd 13.07.2005 17:51 Page 7
Ваш отзыв будет первым