
- Тип техники
- Бренд
Просмотр инструкции тепловентилятора Polaris PCWH2066Di, страница 11
IV. Installation.
Soft
inserts
Gasket
Screws
Fig. 3
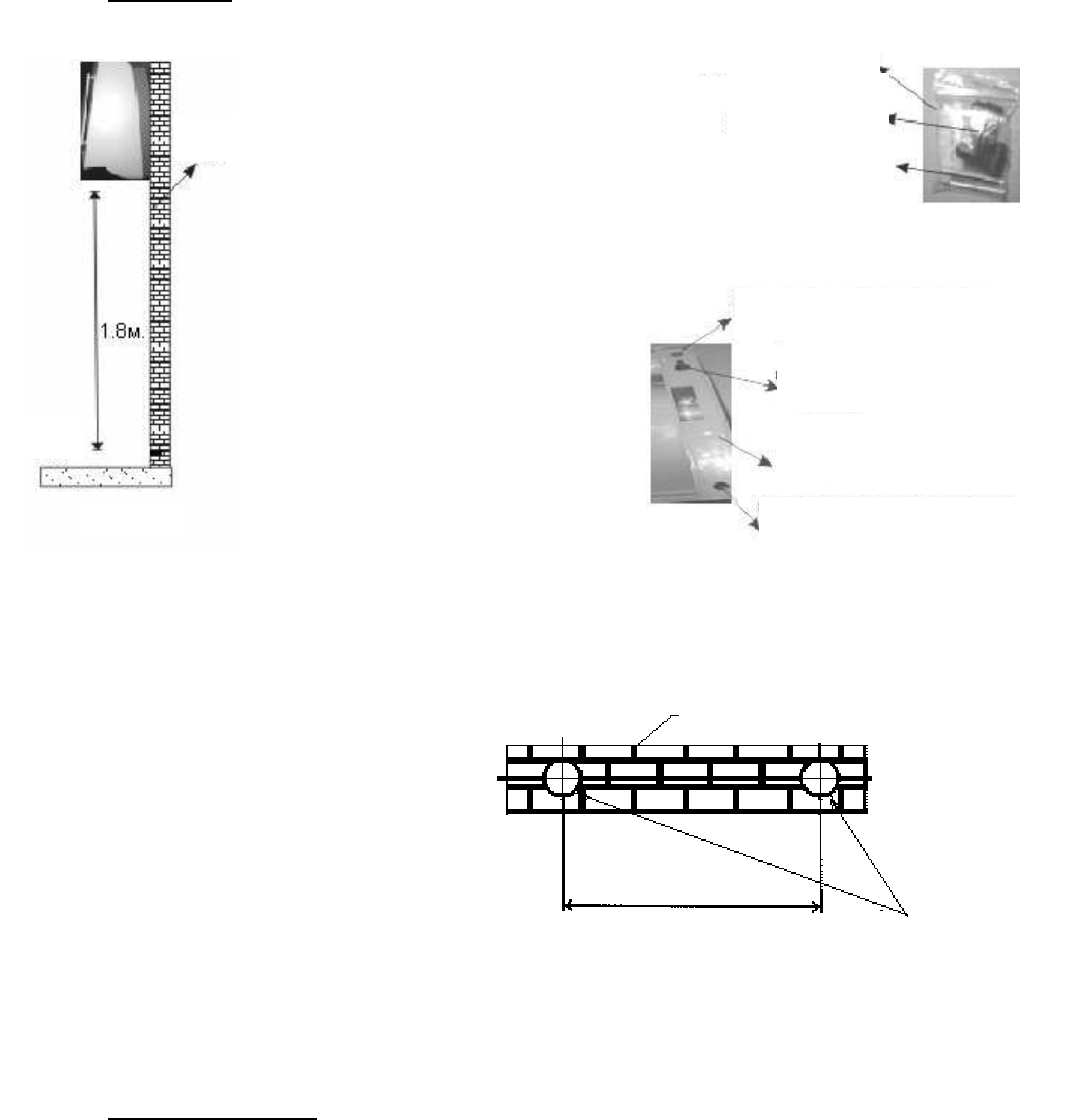
• The heater should be situated at
least 1.8 meter above the floor.
Fig.2
• The plug and power cord should
be installed on height unavailable
for children.
• You need the following
for installation: 2 soft
inserts, 2 screws, 4 gaskets
(all mentioned you will find
in gift box). Fig.3.
• Please, insert the gaskets
into the holes in body. Fig. 4.
Fig 2
floor
Wall
Fig. 4
The hole for gasket
The hole for the gasket
Body
The hole for the screw
• You should make the holes in the wall on 59,6 cm from each other horizontally and at least on 2 m
over the floor. This way the heater
should be at least on 1.8 m from the
floor level. See fig. 2, 5 and 6
Wall
• The depth of the holes in wall should
be 42-45 mm, of 8 mm diameter. The
tighten screw should be protruded from
the wall on 18-20 mm.
59,6 cm
• You may use cord keeper inside the
heater if the power cord is too long.
• After the heater installation, you should tighten the screws.
V. Appliance operation
Remote control
• Observing polarity, insert the batteries into the remote control.
• When pressing a button on the remote control, you will hear tones.
• When you will press the ON/OFF button, the “POLARIS” inscription will light on, the fan will be
turned on, the swing leafs will be opened, and the air stream will go inside the room. You will see the
inside temperature on the display.
• When you will press the "HEATER“ button on the RC, starts the first heating mode – 1kW (2
indicators light on for this mode from left to right side). If you will press on the "HEATER“ button one
more time, you will turn on the second heating mode – 2kW (4 indicators light on for this mode from
left to right side).
Fig 5
The distance between
Holes in wall
the holes
Ваш отзыв будет первым