
- Тип техники
- Бренд
Просмотр инструкции жк телевизора Telefunken TF-LED22S5, страница 4
Before you start
4
4
Before you start
product. If the liquid is spilt, it may cause the
fire, electric shock or breakdown.
• Do not install it at the place on the strong
magnetic field or current field. It may cause
break down. This equipment may be observed
deterioration of the picture by electromagnetic
radiation in electromagnetic environment.
• Fasten the wheel of the product or shelf
with wheels when installing this product. If it
moves or is tipped over, it may be damaged.
• Do not place any fire source such as
candlelight close to this product or place it on
this product. If it is tipped over or fallen down, it
may cause damage or fire.
• Do not place the unit into closed space
of TV for better ventilation; it can reduce the
product lifetime. Keep a space at least 10 cm
at above, left, and right of the TV.
• Please place all the signal cords behind of
rear panel.
• Do not overexert or touch the panel when
you convey the product. Do not transfer the
LED TV up or down display direction.
• Do not transport it with the power cord
or the connection cable connected. If you
move this product with the power cord or the
connection cable connected, damaged power
cord, connection cable or connection terminal
may cause fire, electric shock or breakdown.
• 2 persons or more shall transport the
device, which is heavier than 18 kg. If you drop
or tip over the device, it may damage it.
• The temperature of the product’s body
becomes a little higher after a long period use.
This phenomenon indicates that heat exchange
in normal working mode, thus please do not
let children or anyone who is sensitive of
temperature to touch.
All images provided herein are schematic
drawings and may differ from real objects.
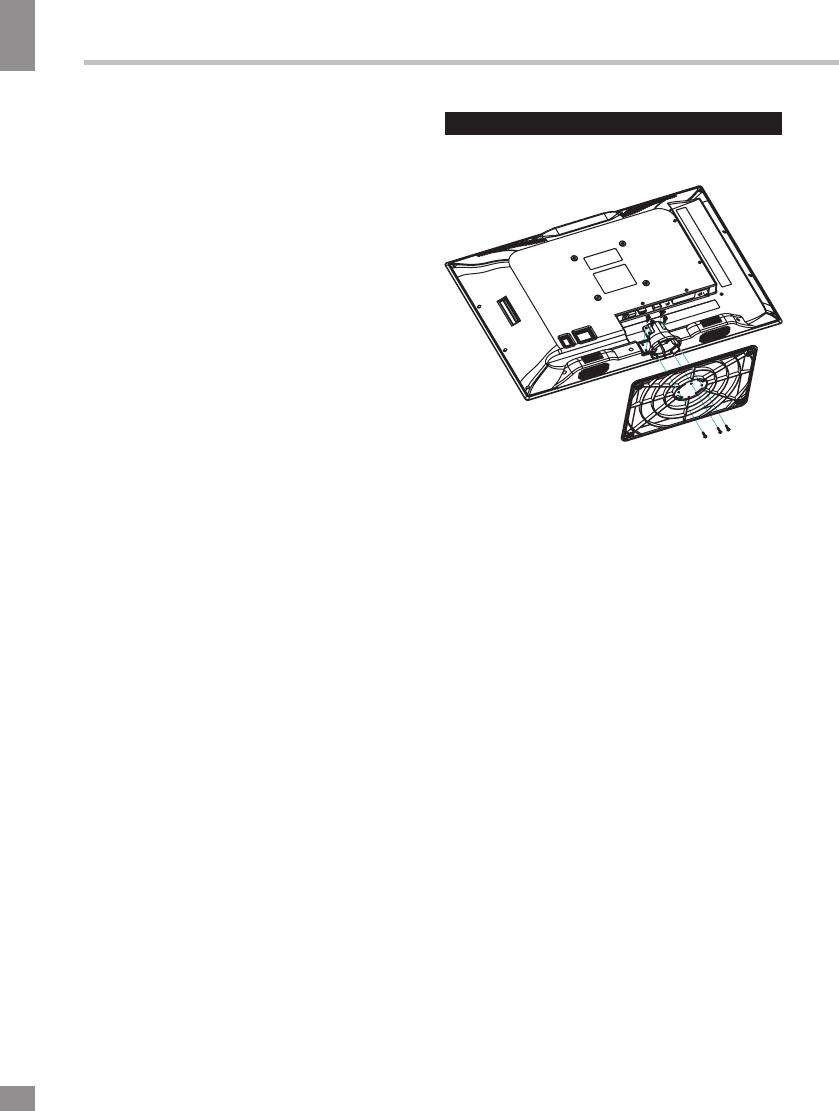
Installation
Base instalation
Cover a flat stable surface with a soft cloth.
Place the TV unit facedown on the cloth. First
align the base with the holes on the back of the
unit and fix it with 4 PB4*14mm screws. Then
match the holes in the stand with the fixing
pins in the bottom of the base. Fasten with 3
BB3*8mm screws.
Wall mounting
• Unscrew the 4 screws from the stand in
the back of the unit. Separate the stand from
the cabinet before wall mounting.
• For wall mounting the back panel of this
unit is equipped with 4 screw holes (for 4*8
screws, 100 mm horizontal spread distance
x 100 mm vertical spread distance). A
wall-mount bracket should be used for wall
mounting (the bracket is not included and
should be acquired separately). Manufacturer
is not responsible for improper mounting
resulting in damage of the unit.
Wall or ceiling mounting implements
must be durable and sufficient enough to
support the weight of the unit.
Ваш отзыв будет первым