
- Тип техники
- Бренд
Просмотр инструкции кондиционера Daikin UATYQ-CY1, страница 35
33
ENGLISH
STEP 9
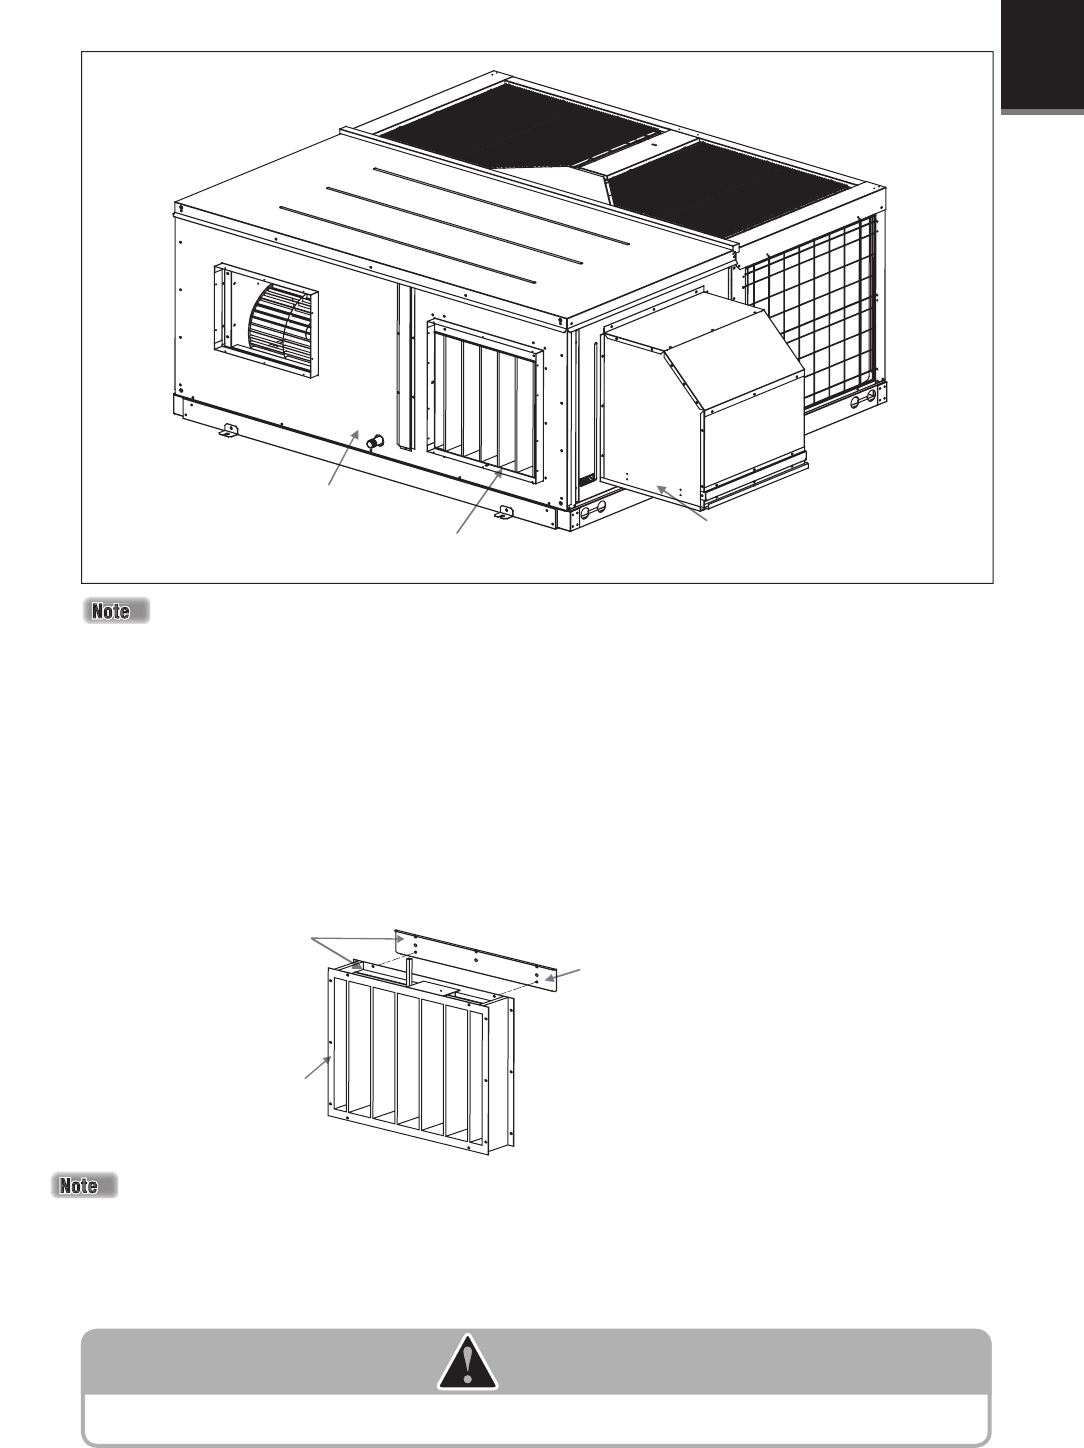
- Finally, you may see the unit with economizer kit as shown in the diagram below:
Rain hood
Return air
damper
Rooftop
unit
Unit shown in the diagrams from step 1 to step 9 are UATYQ350. Other models shall follow the same method.
(ii) Down return (vertical) application
STEP 1
- Disconnect power supply to the unit and install a safety lockout tag before installation, commisioning or service
of the economizer unit. Prepare all the tools required as mentioned above.
STEP 2
- Unpack the wooden crate of economizer kit by using crowbar and hammer. Then, remove the polybags containing
loose parts and fasteners by using cutter. Perform preinstallation checking as mentioned above.
STEP 3
- Attach support bracket, down throw (item 12) to return air damper (item 11) by using screw M5x16 (item 13)
provided in the kit.
Screw item 12
to item 11.
Item 12
Item 11
STEP 4
- Mount 1pc Belimo actuator, LF24-SR (item 1) to return air damper (item 11). Align and insert the hole of actuator
to the shaft of the damper.
CAUTION 1
The default setting for return air damper (item 11) shall be fully opened. Ensure this damper is in ‘fully opened’ position
before mount the actuator. Fail to do so will cause errors during the unit normal operation.
Support bracket, down throw (item 12) is not available in ECON0700. To install economizer kit for this model,
ignore step 3 and jump to step 4.
1 IM 5RTBR-0710(2)-EN.indd 331 IM 5RTBR-0710(2)-EN.indd 33 1/10/11 3:39:19 PM1/10/11 3:39:19 PM
Ваш отзыв будет первым